
How to debug the extension
How to enable debug mode and collect logs for troubleshooting
If a Java Web Start application doesn’t run as it should, debug mode makes the extension write detailed logs, which help us find the problem.
Check the extension is working

Before turning on debug mode, check that the extension is handling .jnlp files:
- Is the extension pinned? Make sure the extension is pinned to your browser’s toolbar.
- Is the extension enabled? Check your browser’s extensions page (
chrome://extensionsoredge://extensions) to confirm it is toggled on. - Are you using the correct extension? Make sure you have the extension for Java Web Start, not the one for applets.
- Does the application launch? When you click a
.jnlplink, the application should start automatically, with the extension side panel on the left side of the screen. - Did the JNLP file download instead? If your browser downloads the
.jnlpfile instead of launching the application, you can use drag and drop to test it—simply drag the downloaded file into the extension popup. - Are there any Network errors? Open the browser’s developer tools and check the Network tab for failing requests.
- Are you seeing socket errors? If the application reports errors when it opens network (socket) connections, it needs a Tailscale
 network: set it in the extension’s advanced settings, or ask us on Discord.
If all of that is fine and the problem remains, ask us on Discord or open an issue on GitHub, with the logs from debug mode described below.
Turn on debug mode
To turn on debug mode:
-
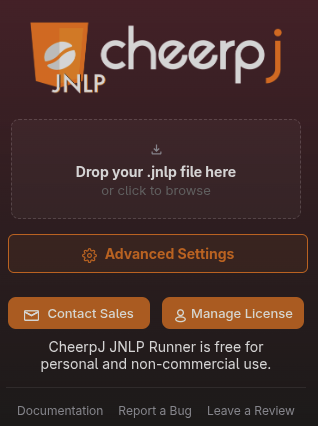
Click the extension’s icon in the toolbar, then Advanced settings.
-
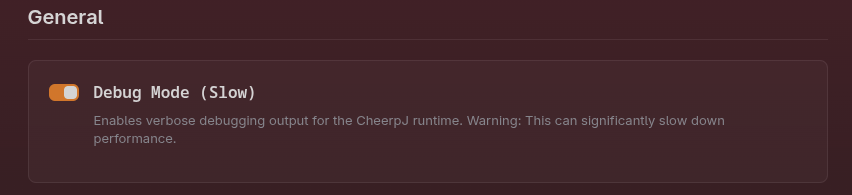
Under General, toggle Debug Mode (Slow) to On.
-
The extension now uses the debug version of the CheerpJ runtime, which logs much more and runs more slowly.
Reload RequiredYou must enable the debugging mode before loading your application, or reload the page after enabling it. Otherwise, the setting will not take effect.
Collect the logs
We usually need two files: the console log and a network HAR file.
Step 1: Open Browser DevTools
To ensure we receive complete logs, you must reload the page after opening the developer tools.
- Press
F12(Windows/Linux) orCmd + Opt + I(Mac) to open the DevTools. - Alternatively, right-click anywhere on the page and select Inspect.
Step 2: Save the Browser Console Output
- With the developer tools open, navigate to the Console tab. (If you don’t see it, click the
+symbol in Edge or>>in Chrome, then select Console). - If needed, trigger the error in your application.
- Right-click on any message in the console tab and select Save as…
- Save the console log to a file.
Step 3: Extract a HAR File
A HAR (HTTP Archive) file logs your browser’s network interactions and helps us diagnose loading or server responses.
- In the developer tools, navigate to the Network tab.
- Reload your page to ensure the network log captures requests from the very beginning.
- Trigger the error in your application if needed.
- Click the download icon (
↓) at the top right of the Network tab to export and save the HAR file.
Attach both files to your bug report on GitHub, or send them on Discord. Issues on GitHub are public, and logs and HAR files can contain internal addresses, cookies and other private data: for an internal or private application, send them to jnlprunner@leaningtech.com instead.