Manual Installation in Chrome
Install an unpacked build of the extension in Google Chrome, for testing a fix
This page shows how to install an unpacked build of the extension in Google Chrome.
ImportantThis is only for testing. When the store version doesn’t work for you, we may send you an unpacked build to try a fix quickly. Use the store version otherwise.
Step 1: Unzip the Extension

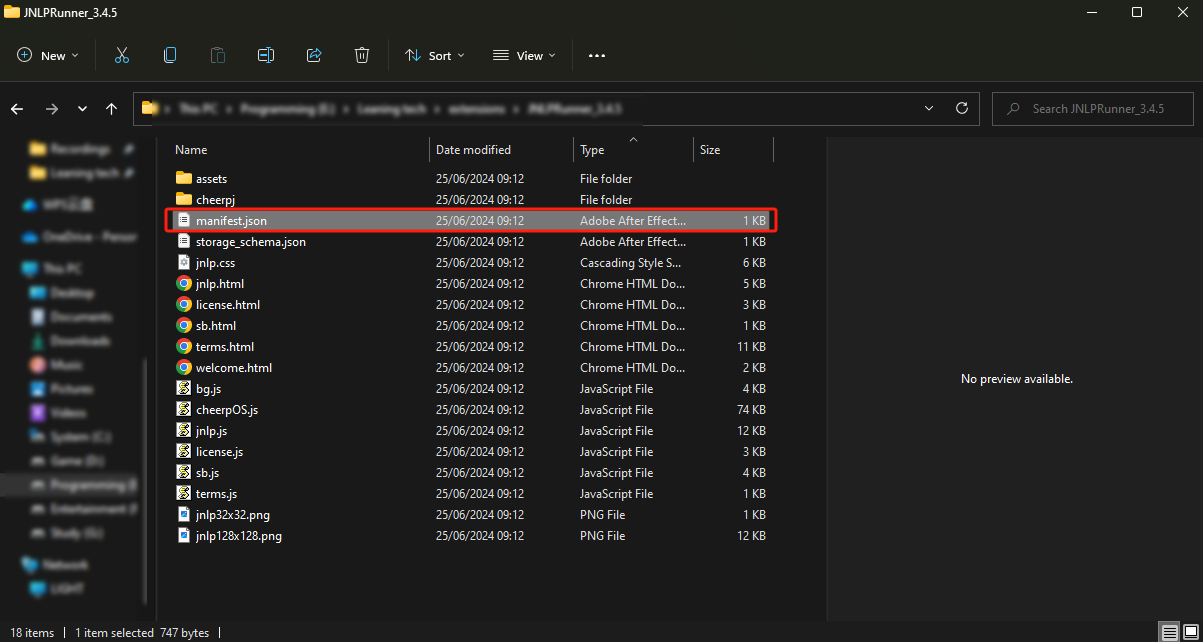
Start by extracting the extension file into a folder. Ensure that this folder includes the manifest.json file, which is crucial for Chrome to recognise and load the extension.
Step 2: Open Chrome Extensions Settings
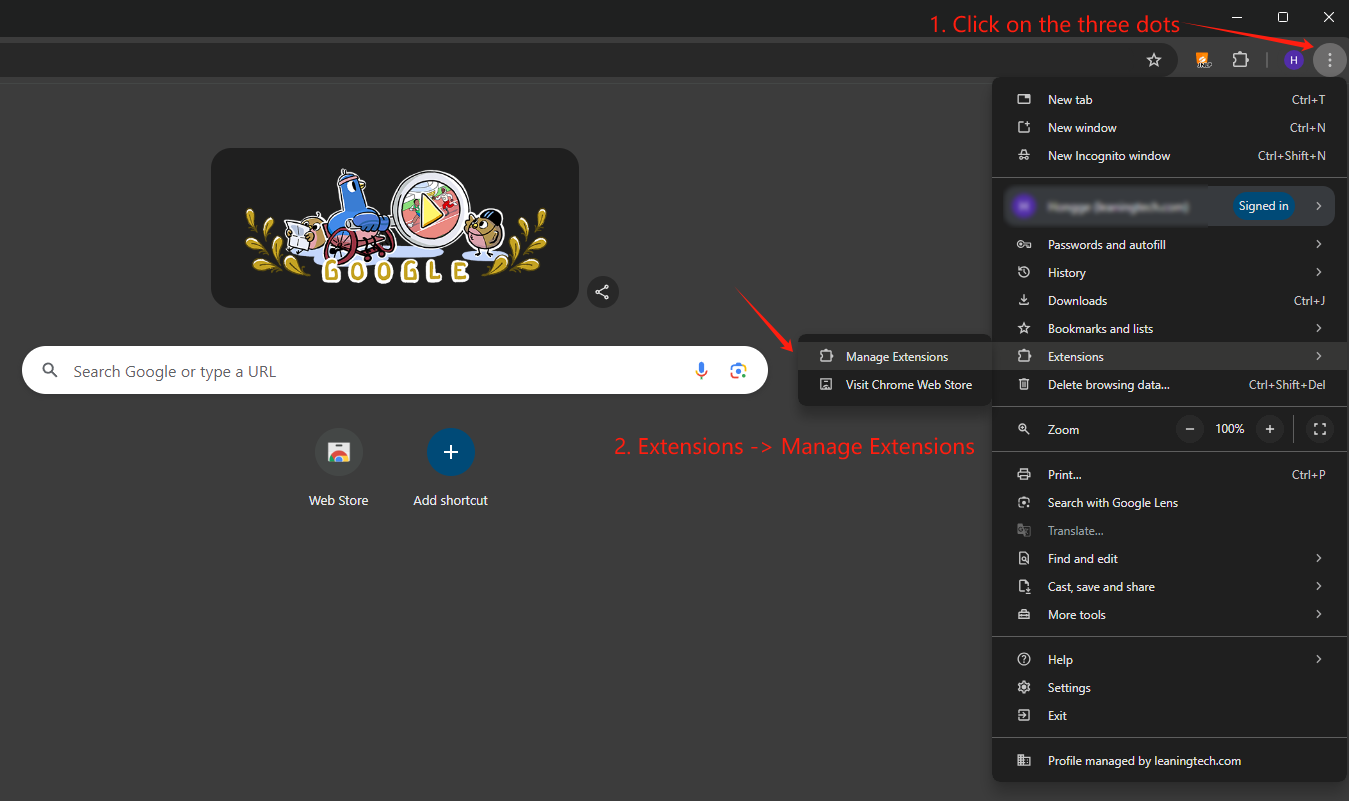
Open the Chrome extensions settings by clicking the three dots in the upper-right corner of the Chrome browser, going to Extensions and then selecting Manage Extensions.
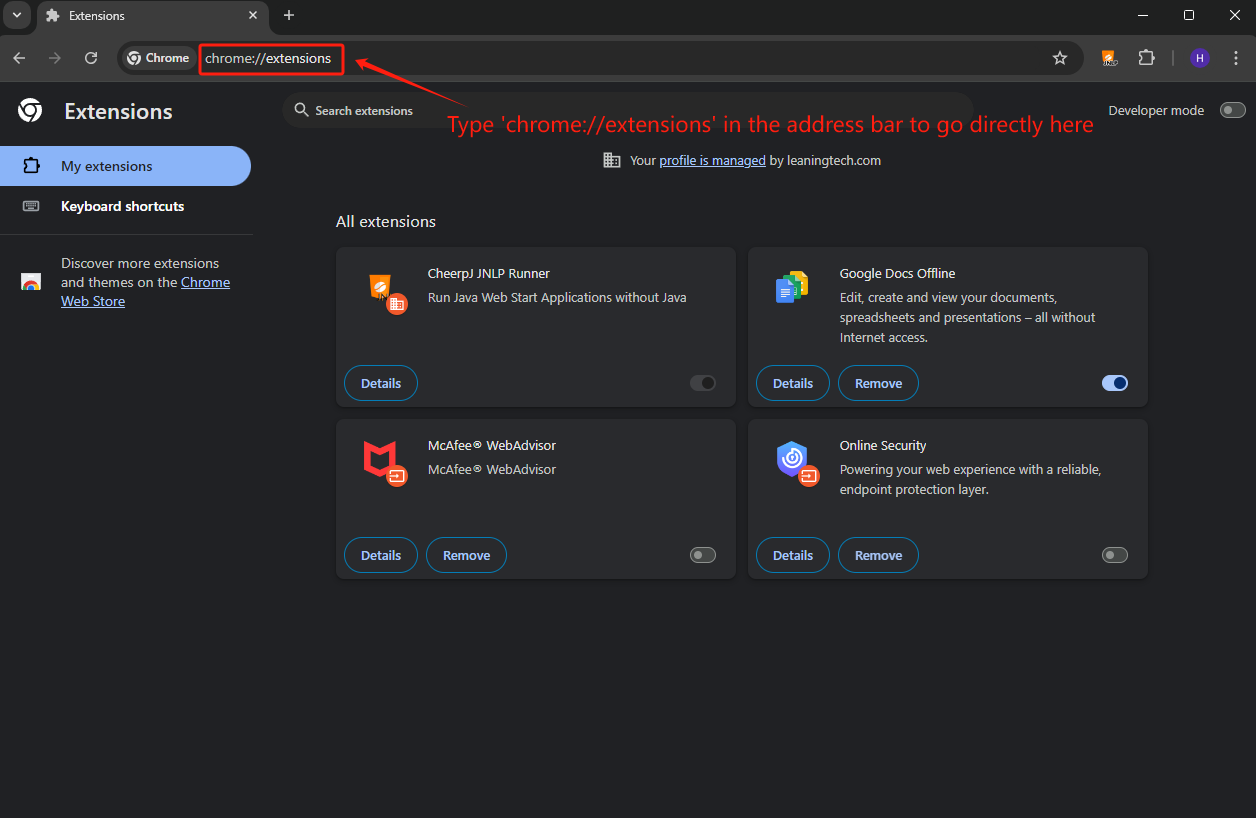
Alternatively, you can type chrome://extensions/ in the address bar to go directly there.
Step 3: Enable Developer Mode
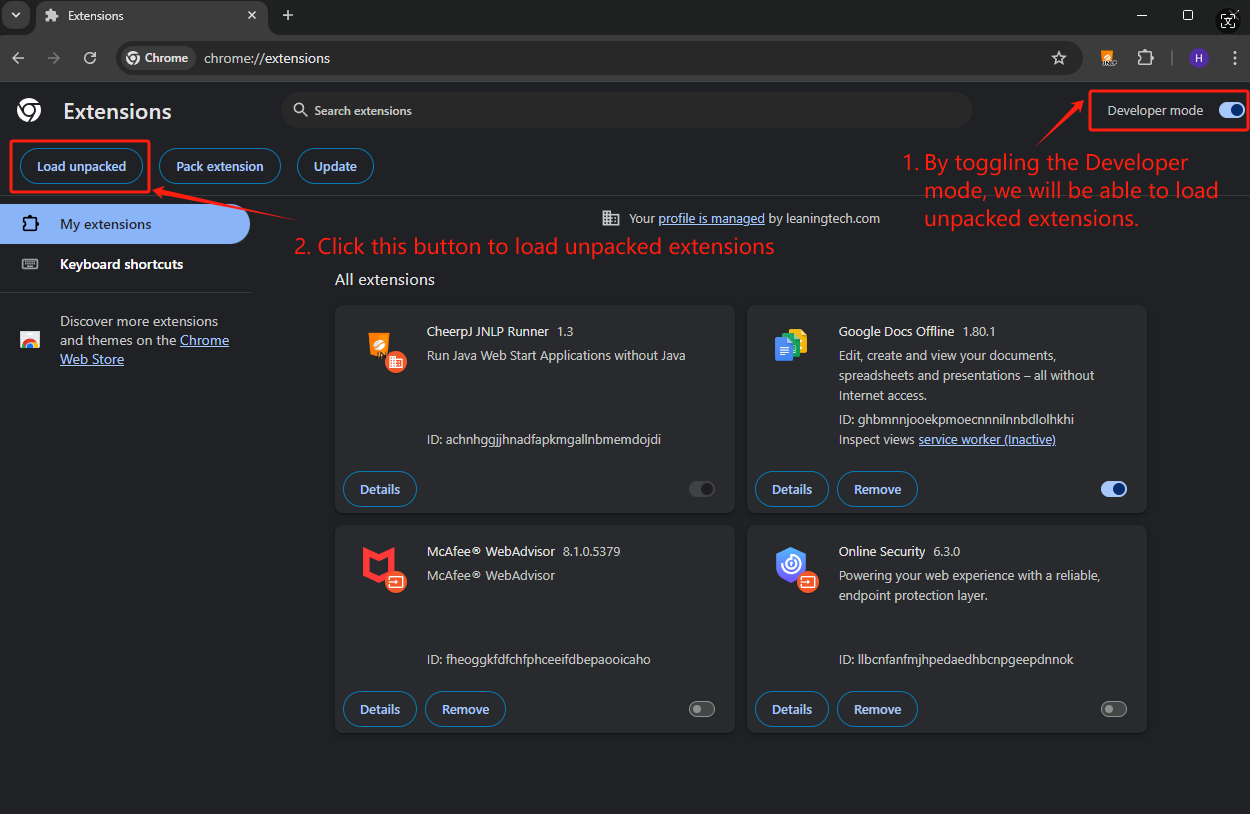
Toggle the Developer mode switch to enable it at the top-right of the Extensions page. This allows you to load unpacked extensions.
Step 4: Load the unpacked extension
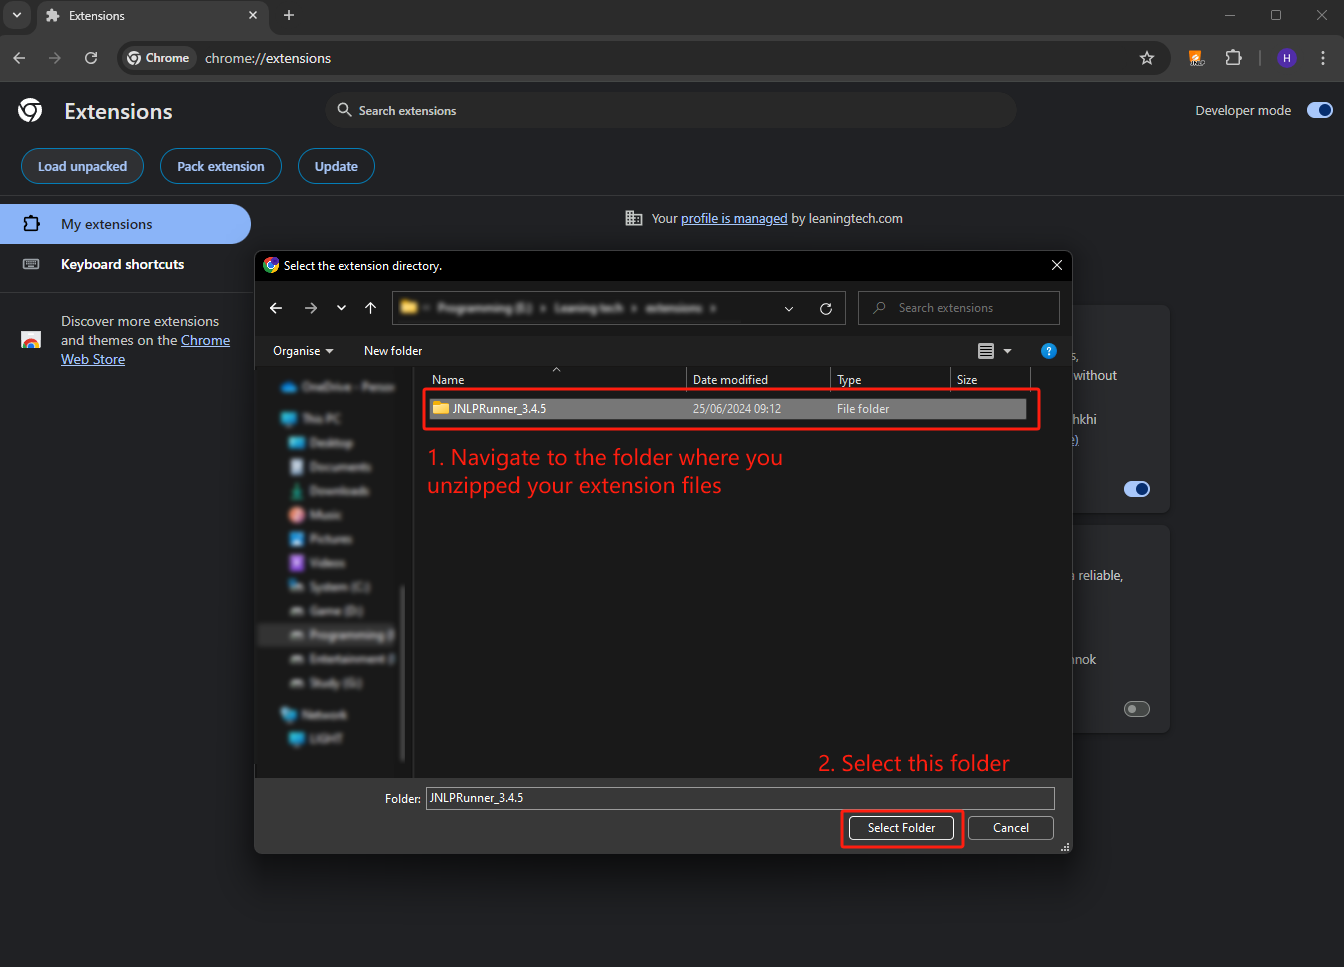
Click Load unpacked and navigate to the folder where you unzipped your extension files. Select the folder and confirm to load the extension into Chrome.
Step 5: Verify Installation:
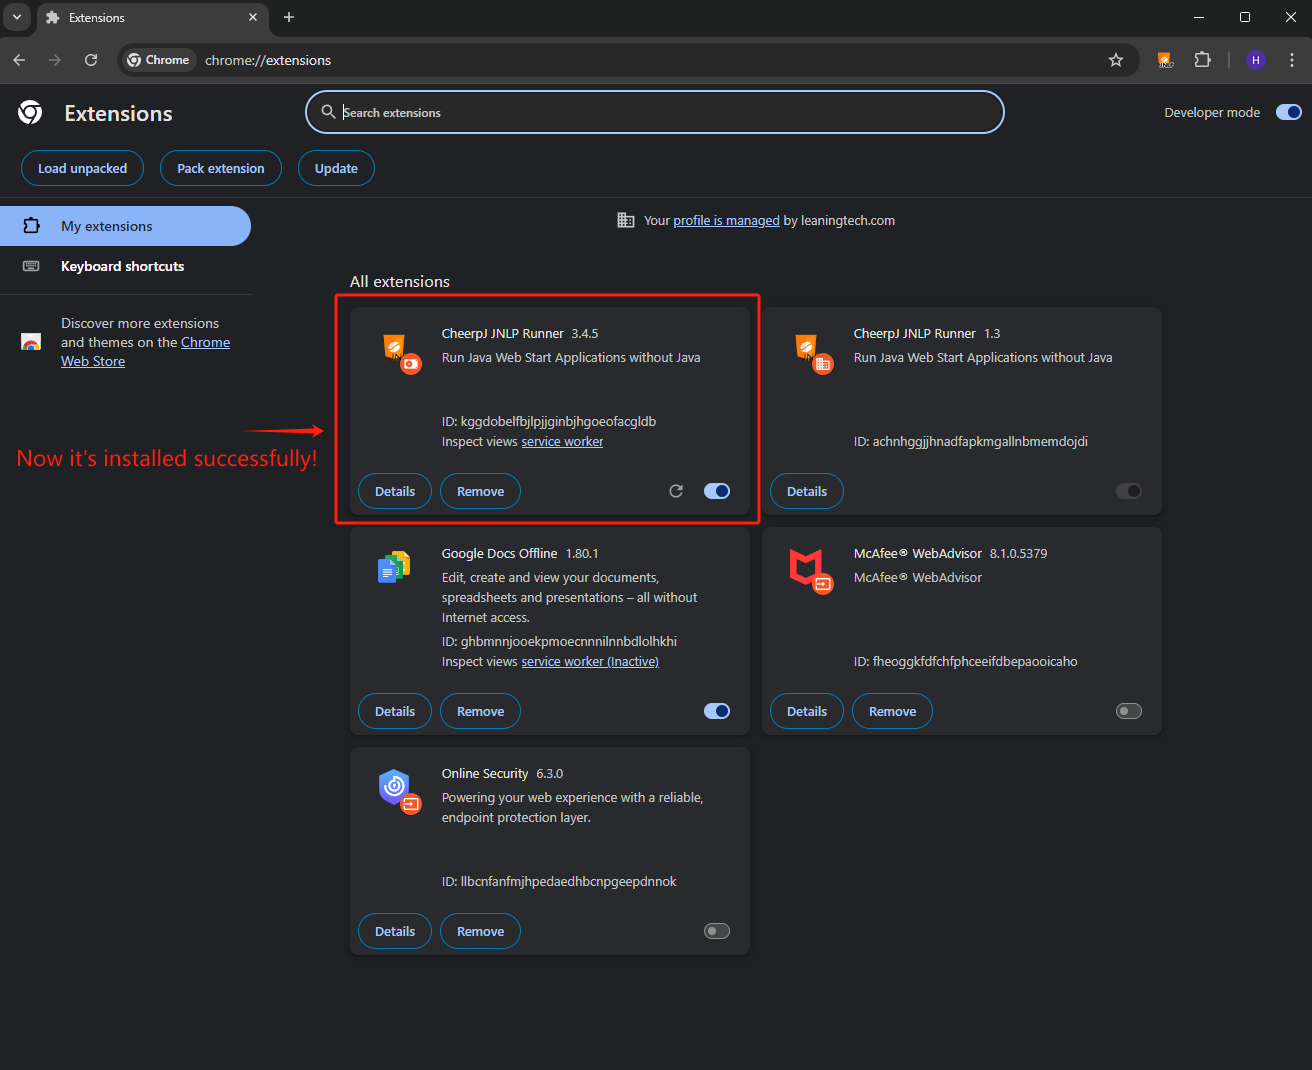
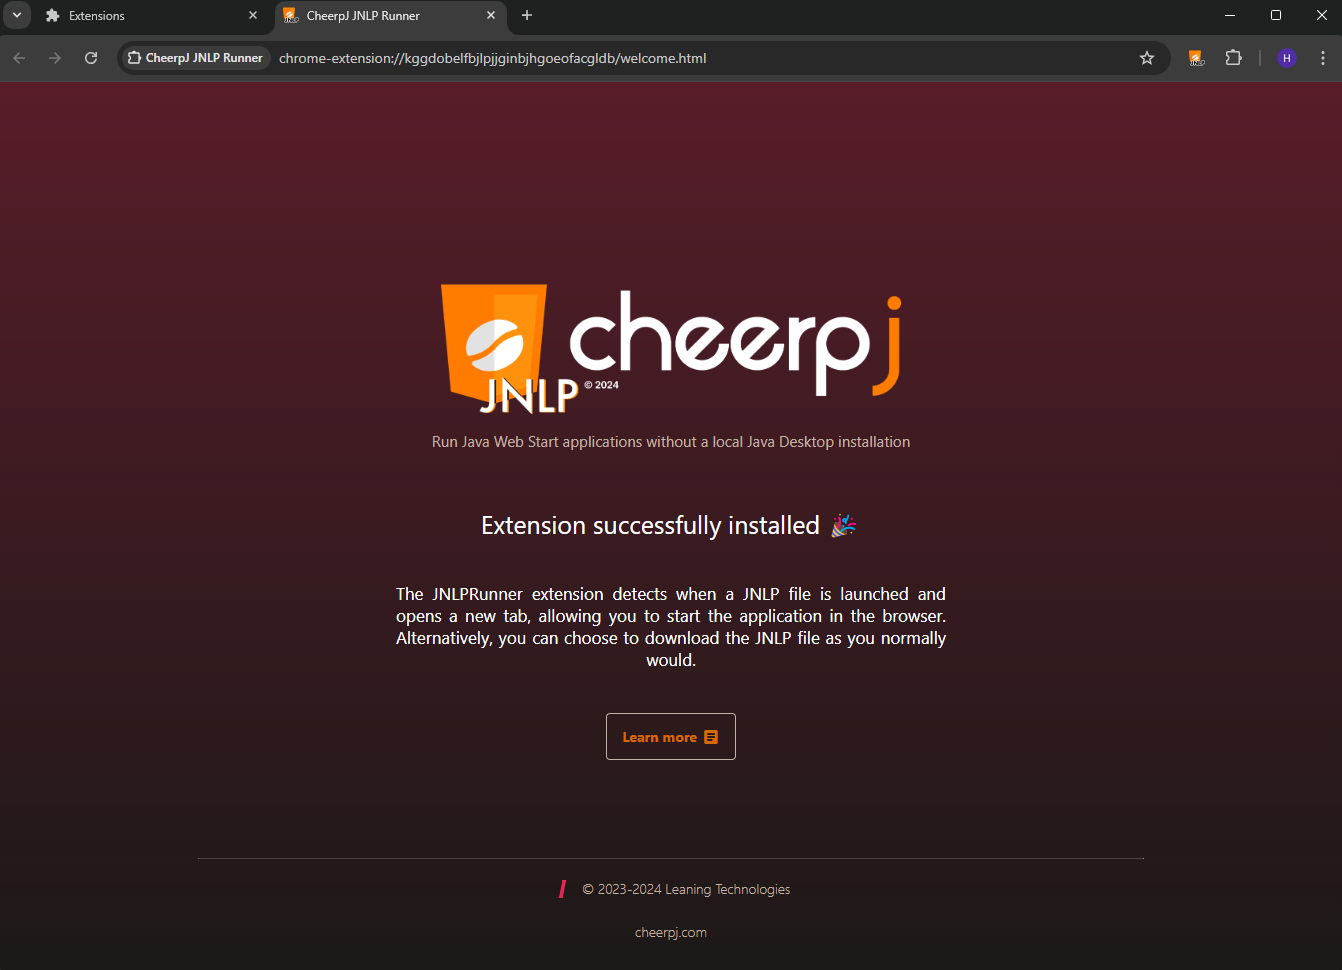
Once installed, the ‘Extension successfully installed’ screen will pop up in a new tab.
You can now manage the settings or remove it from this page: